Tips and tricks
To our discontinued products!
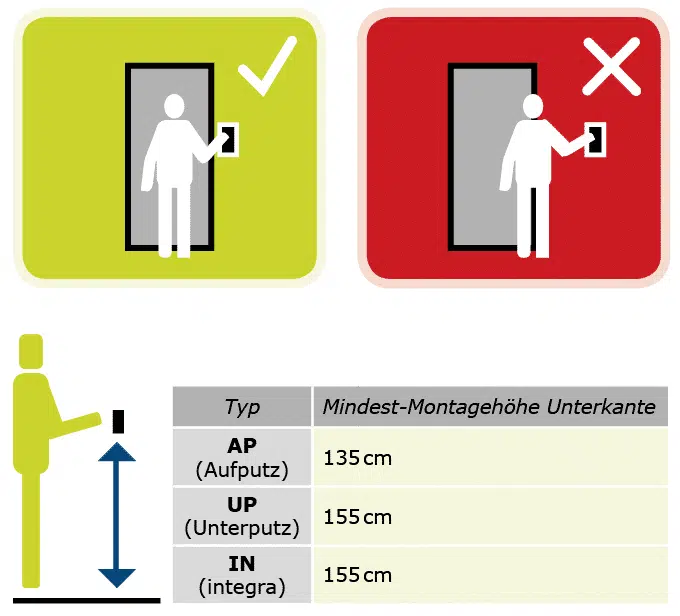
The installation position and mounting height
Installation position: The correct position of the fingerprint scanner makes finger guidance much easier and thus improves finger recognition. The fingerprint scanner is equally easy to use for right- and left-handers! It is important to stand freely in front of the fingerprint scanner. Dislocations worsen the scan result.
Mounting height: Ergonomically correct operation is only possible if the mounting height is correct.

Mounting the control panel
The control panel switches the relay and may therefore only be installed in secured indoor areas (protection against tampering). However, it should be easily accessible for programming.
The finger guide
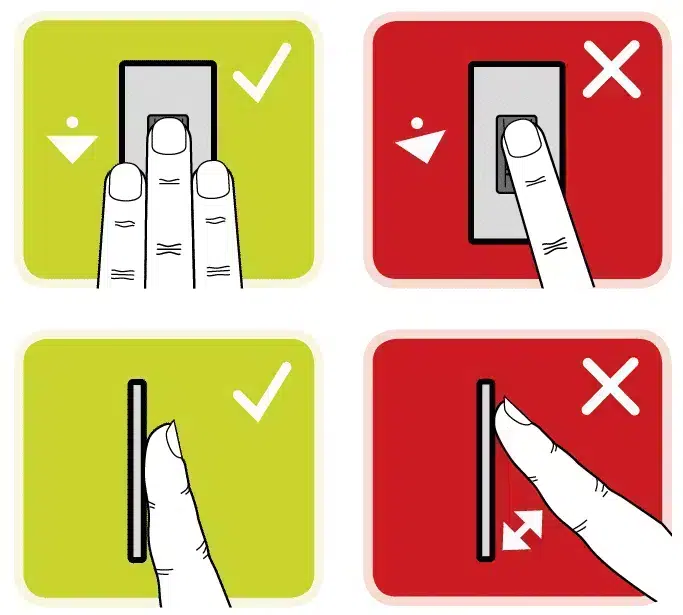
Good finger guidance is crucial for optimal recognition. It is best to stretch out ALL your fingers and place the finger to be scanned on the finger guide so that only the first phalanx rests on it. The joint of the first phalanx should be directly over the sensor.
The neighboring fingers are to the left and right of the scanner. During the drawing process, the finger should never be rolled over the fingertip. Swipe your finger across the sensor with moderate pressure and an even, medium speed: not too fast and not too slow. Incorrect pressure leads to poor results.
The pressure can be changed depending on the skin type. Soft skin requires less pressure, dry skin more pressure. Test the best scan results for you. In the beginning, the finger guidance requires some practice. You quickly learn how to use it optimally.

The sensor and the finger surface
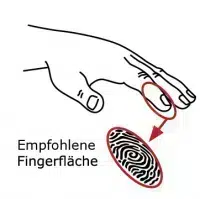
The sensor is the narrow horizontal stripe in the lower area of the finger guide. The front knuckle of the finger must be swiped completely over the sensor for best results. The sensor must not be exposed to any mechanical stress other than operation with the finger.
Do not scratch the sensor with your fingernail. Never clean the sensor with the rough side of a sponge or with aggressive cleaning agents. A damaged sensor must be replaced.

The finger scan
Experience shows that fingers are most suitable in the following order: first middle finger, second index finger, third ring finger. The thumb and little finger should not be used. Everyone has better and less suitable fingers. The writing hand is advantageous because you have more feeling in this hand (right/left-handed people). Please choose a clean finger without injuries and abrasions. A groove structure that is genetically determined or too shallow due to wear and tear cannot be detected by the sensor. A beautiful and clearly visible grooved structure makes it easier to identify. For children, the index finger, or whatever finger the child uses intuitively, works best. Use the fingers that are most comfortable to use and quickest to recognize.
Save fingers
For comfortable two-handed operation and as a precautionary measure in the event of injuries, one finger of each hand should be taught in. In the case of fingers that are not so easy to scan, such as small children, older people or craftsmen, the same finger should be taught in on several memory locations. 99 finger storage locations are available with ekey home/ekey multi. In principle, it is better to save one finger several times than several fingers each once. This increases the chance of detection and the system works better in border areas (dry fingers, skin cream or sweat after sport) or with unfavorable operation.
With the 1-relay variant, you simply use the same user memory location, e.g. B. F1-F5 for the first finger and F6-F10 for the second finger. You have used up 5 reference scans each and therefore a total of 10 storage locations.
Children’s fingers: Basically, children’s fingers work from about school age. However, it may be possible to train younger children using the multiple storage described above. The prerequisite for correct operation is the specified mounting height for IN, AP and UP. If, when you swipe your finger over the sensor, the LED immediately lights up red without flashing yellow beforehand, the finger was not swiped correctly over the sensor, or you waited too long. As soon as the finger is placed on the sensor, it must be pulled down immediately. The software interrupts the scanning process and signals this by the LED briefly flashing red.
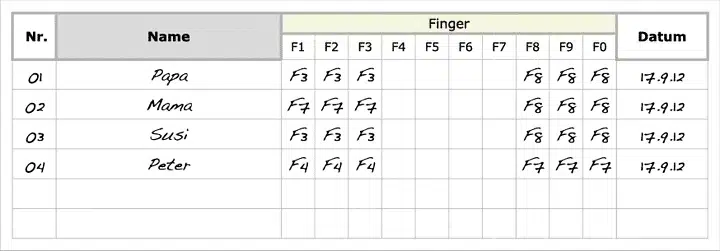
Example person 1:
- Memory 1, F3 for the left middle finger
- Memory 1, F8 for the right middle finger

For control panels without a multi-line display, a list of the stored fingers is useful.